Coding recipes using the newest automation testing tool
There’s a new kid on the block in the world of automation testing tools….Playwright!
Created by Microsoft, Playwright is an open source browser automation framework that allows JavaScript engineers to test their web applications on Chromium, Webkit, and Firefox browsers.
While Playwright is still very new, there’s quite a buzz around the tool. So, I decided to try it out for myself.
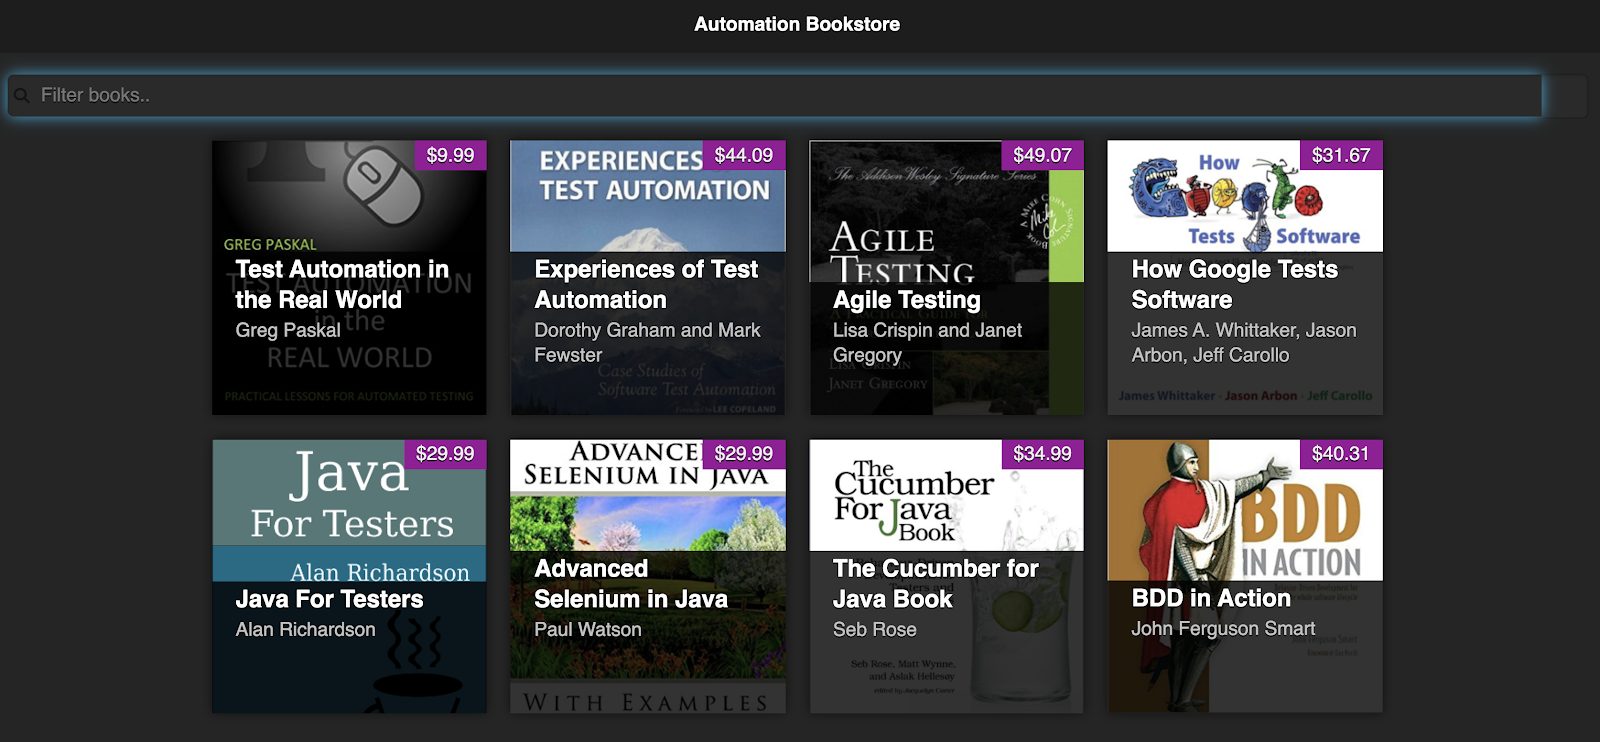
The Playwright documentation contains a ton of information about how to get started as well as details on their APIs. So, I won’t rehash all of that here. Instead, I will automate real scenarios from the Automation Bookstore application, which will demonstrate examples of using the Playwright APIs together.

Launching an Application
First things first…launching the browser and navigating to the application’s url.
The first step to do this is to declare which browser engines you’d like to run against. Again, Playwright allows you to run your tests against Chromium, Firefox, and Webkit.
I’ll only run against Chromium for now.
Sidenote: By default, Playwright runs in headless mode. If you’d like to actually see the browser as it’s executing the test, set headless to false in the launch call:
Next, I declare variables for the browser and the page objects.
An important thing to note about Playwright, is that all of their APIs are asynchronous, so async/await is needed to call them. So, I utilize this pattern to launch the browser and initial the page object.
Now that I have the page object, I can go to my application using page.goto()
Adding an Assertion Library
A key thing to note about Playwright, is like many other automated testing tools, it is designed to automate browser interaction, but you must use an assertion tool for your verifications. I’ll use Mocha for this example.
I’ll also add a suite (using ‘describe’) and move the Playwright calls inside of there into before/after functions.
Accessing Elements
When trying a new tool, I like to start with a very simple example. Basically, the “Hello World” of web test automation is verifying the title on the page. So, let’s start there and make the first test!
Playwright offers many ways to access elements including the typical ones of CSS and Xpath selectors.
When inspecting the DOM of this application, the element that displays the title has an id of ‘page-title’, and the text I want to verify is the inner text of this element.
So, I’ll use page.innerText and pass in the CSS selector for this id.
And voila, just like that, I have my very first test!
To run a Playwright test, type npm test from your terminal.
Entering Text
Now that I’m up and running, I’d like to do something a little more interesting, such as search for a book.
To do so, I need to enter text into the Filter Books field (which has an id of ‘searchBar’).
To enter text, Playwright provides the fill() API, which accepts a selector as well as the text to enter.
Waiting for Elements
Playwright does a great job of waiting for the elements to be ready before attempting to interact with them, so I don’t have to worry about that. However, sometimes explicitly waiting is still needed.
For example, when I enter text into the field, Playwright will wait for the field since that’s the element we’re interacting with, but the verification needs to occur on the search results.
There is a slight delay between the time that the text is entered and when the results are shown, so my script must account for that.
Fortunately, in the latest release of Playwright (1.4), the waitForSelector API was introduced. I can use this to wait until hidden books become present in the DOM.
Getting List of Elements
Now that I have the search results, I want to verify that there is only one book returned. To get a list of the elements, I use the $$ API on the page object to query for all elements matching a given selector.
Now, that I have this list of elements, I can verify that it only contains one book.
Accessing Children Elements
In addition to verifying the quantity, I also need to verify that the title is as expected. Since I have a list of all of the visible books, I don’t know exactly what the ID will be for the book at runtime, so I’d prefer to just get the child element from the visible book that holds the title. This is an h2 element, as seen on line 4.
To access descendant elements in Playwright, you can use Clauses. Clauses are selectors that are separated by >>, where each clause is a selector that is relative to the one before it.
So, in my case, where I’d like to get h2 that is a child of this particular li, I can do so with ‘li:not(.ui-screen-hidden) >> h2’
And now the second test is done! On line 5 is where the parent selector is defined, and line 8 is where I expand to use a clause to target a child node.
This particular scenario used a list that only contains one element, so I added one more scenario that demonstrates how to work with a list of multiple elements.
Visual Testing
That last scenario got a bit long, and honestly, I’m only verifying a fraction of what I should be verifying. For more thorough tests that not only verify the count and title, but also verify everything else on the page in addition to making sure it’s displayed correctly, I’ll use visual testing.
Note that Playwright offers image and video capture, but it’s more meant as a visual logging mechanism, and can’t be used in the assertions themselves. So, I’m going to use a proper visual testing assertion library, Applitools.
After installing Applitools, I specify the Applitools classes required on line 3.
I declare and initialize the ‘eyes’ object (on line 3), which is the API that does the visual testing.
Then redo the last test using visual testing.
Cross Platform Tests
While Playwright provides support for Chromium, Webkit, and Firefox, there is no built-in support for IE.
When integrating Playwright with Applitools’ Ultrafast Grid, I can now get further coverage for my tests!
As opposed to using the Applitools Classic Runner as I have above, I’m going to modify it to use the Visual Grid Runner. On line 5, notice I use the number 10. This indicates the number of tests I’d like to run in parallel…making my run even faster!
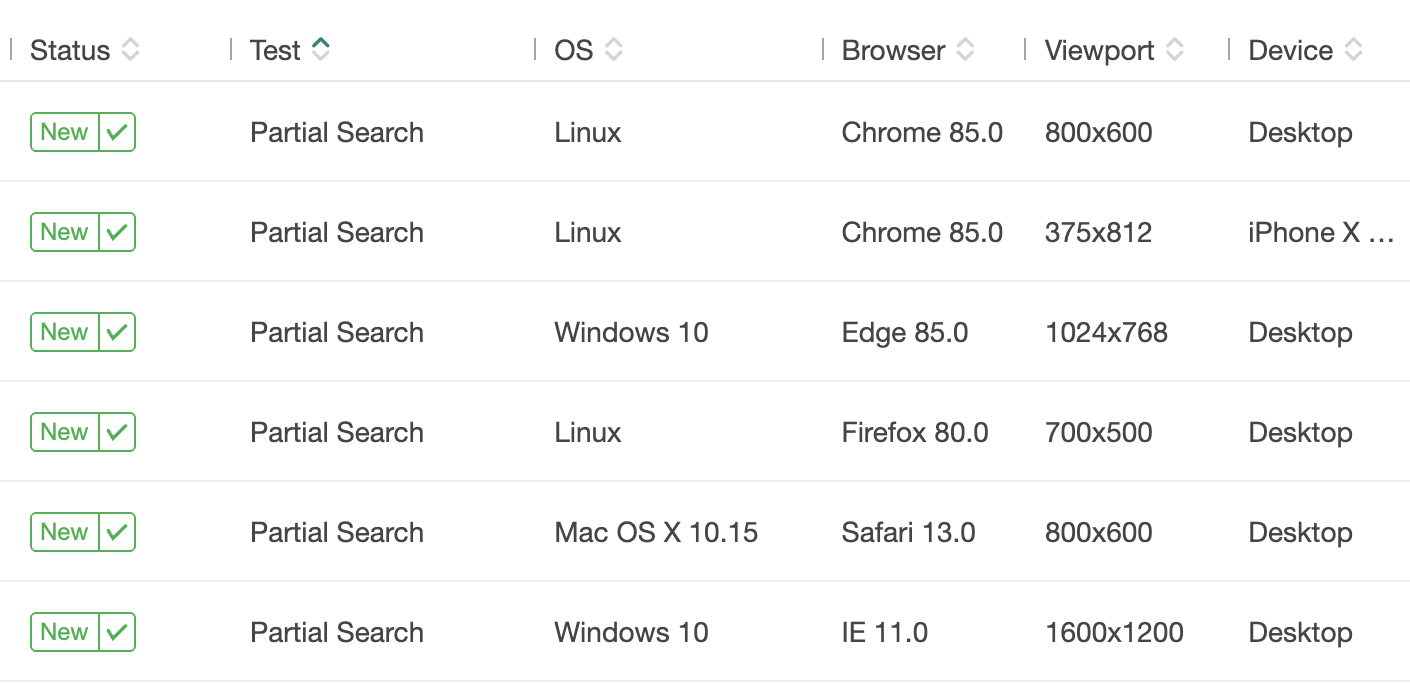
Now for the good part! I can specify all of the browsers, devices, and viewports I’d like to run against – giving me the ultimate cross-platform coverage for my tests. Not only verifying them functionally, but also visually as well.
No changes are needed to the tests themselves, they will automatically run across all of the specified configurations.

Play with Playwright Yourself
Reading blog posts helped me understand what Playwright is but when I played around with it to explore realistic scenarios is when I truly got a feel for the tool! I recommend you do the same.
You can use the code examples from this blog post as well as Playwright’s documentation to get started. Good luck!


