Running cross-environment tests
The Eyes cross-environment testing feature allows you to test your application on multiple platforms using a single, common baseline. This article explains how to do this in practice.
Overview
To understand how cross-environment testing is done in Eyes, we must first understand two notions:
- The baseline signature
- The environment name
The baseline signature
The visual testing baseline consists of a set of images that are used as a basis for comparison of images captured during a test. A particular baseline is distinguished from other baselines by two types of information:
- Its name, which is composed of two parts: the application (app) name and the test name.
- Its environment – the environment on which the test whose images were used to create the baseline ran. The environment is defined by three properties: the operating system the test ran on, the hosting application (e.g. browser) that ran the test, and the viewport size of the application window.
When a specific test is run on multiple platforms, all platforms will have the same baseline name, but by default, the environment will be specific for each platform since the precise look and feel of an application can potentially vary depending on the operating system, browser type, and viewport size. As a result, there is a separate baseline for each environment tested.
Cross-environment testing provides you with a way to use a single baseline for verifying multiple environments. While having to manage fewer baselines can be convenient, using a single baseline for multiple environments can potentially reduce the accuracy of the test because the matching algorithm needs to allow for valid differences between the environments.
The environment name
Eyes provides a way to assign a name to a specific environment. For example, we can give the name “desktop browser” to the environment composed of the Chrome browser, running on Windows 10, using a viewport size of 1500 x 960 pixels.
Eyes provides an SDK command that allows you to specify that a test should use a baseline that matches a specific named environment, instead of the baseline that matches the test environment. This is the basis for cross-environment tests since it allows you to specify, for example, that for a given test, the baseline that matches the “desktop browser” environment should be used for verifying all test runs irrespective of the OS, browser, or viewport.
Running cross-environment tests in practice
- Planning
- Setting up the test in the SDK and Test Manager
- Reviewing and resolving mismatches
Each of these steps is expanded on in the following sections.
Planning
The first step is to decide which environment will be the “master” environment. The choice of environment is dependent on many factors, such as your user base, your toolset, and more. Eyes does not have any specific preference as to which environment is used as a master. Let us assume that you have selected “desktop browser” as the master environment (Windows 10, Chrome, and a viewport size of 1500 x 960).
Setting up the test
- First, you need to create a baseline for the master environment, which we refer to here as the master baseline. If you have an existing baseline that is suitable, then you can use that and you don’t need to run a special test.
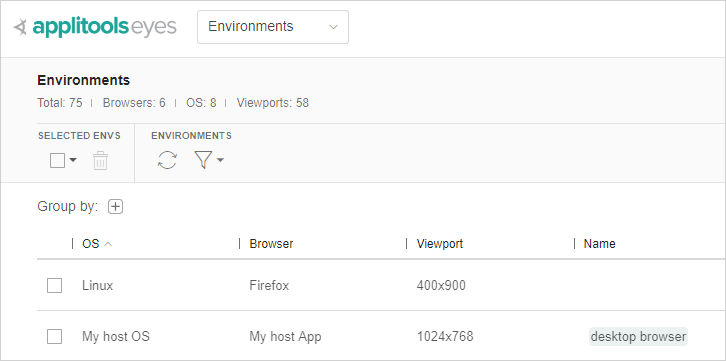
- Next, you need to give a name to the environment used by the baseline. One way of doing this is in the Test Manager Environment page: Find the row with the OS, Browser, and viewport of the master baseline. In the 4th column (with the header “Name”), type in the name of your environment. If the name you add is already being used for a different environment, you will get a warning and you can either cancel or change the environment that the name refers to. For a detailed description of the environment page see The Environment page
 .
. - Now, change your test so that it will run against the master baseline by adding a call to
eyes$setbaselineenvnamebefore the call toeyes$open. - In most cases, since there are substantial visual differences between platforms, use a matching level of “Layout” by calling/assigning
class$configuration$setmatchlevelwhen configuring the test, orclass$eyes$setmatchlevelbefore the call toclass$eyes$open:When using the Ultrafast Grid you need to set the baseline environment for each Ultrafast Grid browser configuration. For details see Setting up the baseline environment when using the Ultrafast Grid.
- When the test runs in the same environment as the master baseline, it is recommended that you use the Strict match level so that you will detect visual regressions that are ignored in the Layout match level.
- That’s it!
Reviewing and resolving mismatches
After a test runs, if there are any mismatches, you will typically want to review them and decide what action to take. In a cross-environment test, you work using all the usual Test Manager features. The only difference is that when the test environment is different from the baseline environment, you will not be able to update steps in the baseline or define regions such as ignore or match level. These operations must be done on a test that ran in the same environment as the baseline so that all the images in the baseline, and operations those images, are from the same environment. On environments that are different from the baseline environment, you can still accept and reject steps and tests, and these are persisted, but they impact the status of the test results (passed/failed) and do not update the baseline information.
- In the Step Editor, above the toolbar, you will see a statement such as:
 If you hover your cursor over the blue browser or OS words, a popup will display the baseline and checkpoint browser, or the baseline and checkpoint OS respectively.
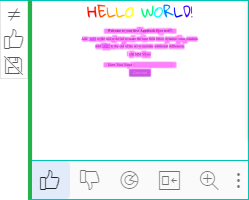
 - The usual 'Save' icon is replaced with a 'Can’t save' icon.
- In the Test results Batch details and Batch steps view, the step thumbnails have an icon
 in the top-left corner that indicates that you can’t update the baseline.

 This indicates that you can’t update the baseline. If you try to click the button, the editor will display a more detailed description of why the save can’t be completed.