When you want to merge a branch into another branch, you use the compare & merge page to initiate a comparison of the baselines in the two branches, to specify how the merge should be done if there is a conflict or you want to override the default and to initiate the merge.
Overview
After you initiate a compare operation,Eyes will display all the baselines, each with a status that indicates one of three possible outcomes:
New. The baseline appears only in the source. By default, this baseline will be merged "as is" into the target. If you want, you can request that Eyes should not include this baseline in the merged branch.
Changed. The baseline appears in both the source and the target, some steps are different, but there are no conflicts, By default when the merge is initiated, Eyes will create target baselines that merges steps from the source and target, You can override this default by specifying that Eyes should take steps only from the target, or only from the source. In the latter case you can set the annotations in the source so that they have any mix of new annotations and annotations from the source or from the target.
Conflict. The baseline appears in both the source and the target, and there is a conflict, e.g., a step was changed in both the source and the target. In this case, there is no default, and you must specify if Eyes should use the target baseline as is or the source baseline. In the latter case, before the merge, you can copy annotations from the target to the source or specify new annotations so that they will appear in the target after the merge.
Workflow overview
- Navigate to the compare & merge page.
- Select the source and target branches and click the Compare button. Eyes will display the baselines that are only in the source or are different in the source and target. Eyes display next to each baseline a status with a value of New, Changed or Conflict.
- You can use the compare baselines editor to view the images and annotations of the target and the source baselines, and to edit the source annotations. See The Compare baselines editor for more details.
- For baselines with a status of New or Changed Eyes can merge the baselines without any user intervention, you can override the default behavior as will be described below.
- In the case of baselines with a status of Conflict, the user must decide if the source or target baselines will be used in the merge, Merge is not possible until all the baselines with a conflict have been resolved.
The steps described above are described in more detail below.
Starting the Comparison
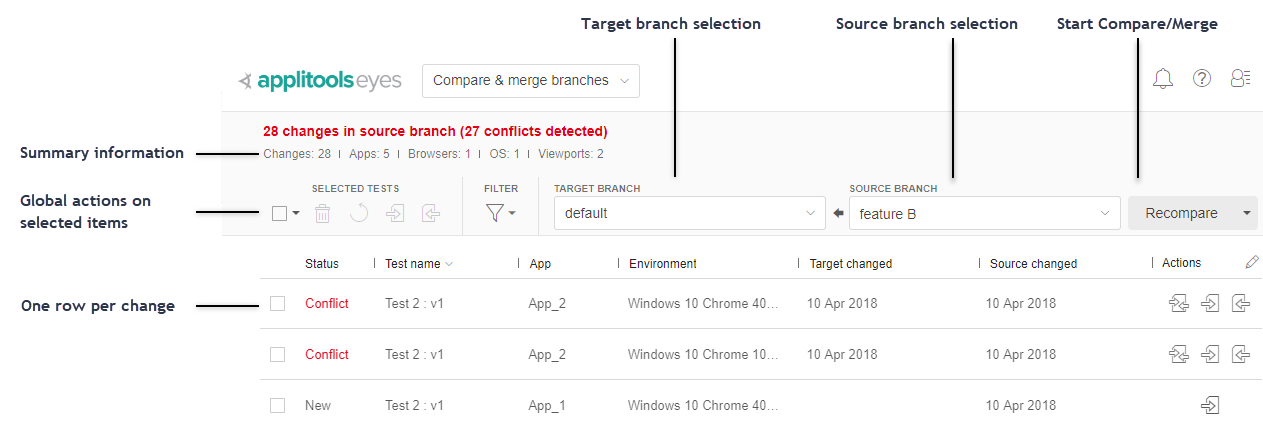
- To start a merge or compare operation, select Compare & merge branches from the Page navigator. If there is no current active merge session, then the screen will look like the screenshot below.
- If a compare was previously initiated and not merged, then the screen will show the current compare session. You can start a new session by simply setting new source and destination branches. Any conflict resolutions decisions you have made on this page will have been persisted when you made them, so at a later point, it will be possible to continue the previous compare and merge operation where you left off previously.
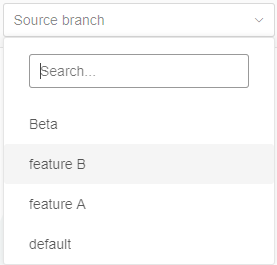
- Click in the right selection box (Source branch) and select the source branch from the list of branches.
- Click on the left selection box (Target branch) and select the branch you want to update with changes from your source branch.
- Click the Compare button and Eyes will display
- a summary panel
- a list of baselines that are new or are different in the two baselines:

In both selection boxes, you can enter text in the search box, and the list of branches will be filtered to only show branches whose name contains that text.
The summary panel
In the summary panel at the top of the page you can see how many changes where detected, and how many of these have a status of new, changed or conflict. You can also see the number of Apps and the variety of operating
Checking changes and resolving conflicts
- New
- Eyes found a new baseline in the source which can be added automatically to the target.
- Changed
- Eyes found a baseline that exists in both the source and the target, and the changes in the source can be copied to the target with no conflict.
- Conflict
- Eyes found a conflict between the source and target baselines. You need to resolve this manually.
You now need to decide what should be done with each baseline. If you want to see the differences between the baselines for a particular change or to set which annotations should be merged into the target, open the merge conflict editor by clicking on the row of the change or by clicking on the  which appears when you hover over a baseline row. See The Compare baselines editor for more details.
Once you've resolved all the differences, you need to tell Eyes if it should use the baseline from the source or from the target. You do this using the following buttons that appear on each row and in the toolbar.
 Keep the baseline information in the target branch as is, ignore the differences in the source baseline.
 Merge the information into the source baseline to the target branch.
You can specify what to do for each baseline by using the buttons on the row of that baseline. Alternatively, you can click the checkbox on one or more baselines and then click the appropriate tool in the toolbar to take that action for all selected baselines. The latter option is best used in combination with the filter tool  described below.
You can also do the following operations on a set of selected rows:
 Delete all the selected source baselines.
 Undo the conflict resolutions for all the selected baselines so that it is in the same state as it was after the compare operation,
Filtering the results
You can use the filter tool  to select criteria which define which rows will be displayed. Then you can select all the visible rows using the toggle selection
  button and use the various tools on the toolbar.
- Filter
- If you type text into the filter text box, then the display will only include baseline whose test name includes the typed text.
- Conflict
- If you check this box, then baselines with a status of Conflict will be displayed.
- Changed
- If you check this box ,then baselines with a status of Changed will be displayed.
- Ignored
- If you check this box .then baselines with a status of Ignore will be displayed.
- Saved by others
- If you check this box, then a baseline will only be displayed if it was last saved by someone other than the logged-in team member.
- App
- Select the application names whose baseline you want to see.
- Browser
- Select the browsers whose baseline you want to see.
- OS
- Select the operating systems whose baseline you want to see.
- Source author
- Select one or more from the following possibilities Saved by me, Saved by others or one more team members from the list of people shown.
- Status
- Select one or more from the following possibilities Changed, Conflict, Ignored, New or Resolved.
- Target author
- Select one or more from the following possibilities Saved by me, Saved by others or one more team members from the list of people shown.
- Viewports
- Select one or more of the viewport sizes that you want to be included in the list of changes.
Grouping the results
You can group the rows of changes into a hierarchy in the usual way, based on the following criteria:
- App
- The application name.
- Browser
- The browser type.
- OS
- The operating system
- Saved by
- Which team member saved this baseline.
- Status
- The merge status value.
- Test name
- The name of the test.
- Viewport
- The viewport size.
Initiate the merge operation
Once there are no more rows with a status of Conflict, the Recompare button will change into a Merge button. Click on the button, and you will see a confirmation dialog, click Yes to continue with the merge or Cancel to abort the merge. When the merge is done, the list of baselines will be empty. and you will see a message confirming that the merge completed successfully. It the merge fails, for example because the target or source have changed in a way that creates a conflict since you last did compare, then the page will update and show you the baselines that conflict.

